
Setting up a new email address in Apple Mail on your Mac is simple and easy, so open up your Apple Mail app, and we’ll get started!
1. Open Apple Mail Settings
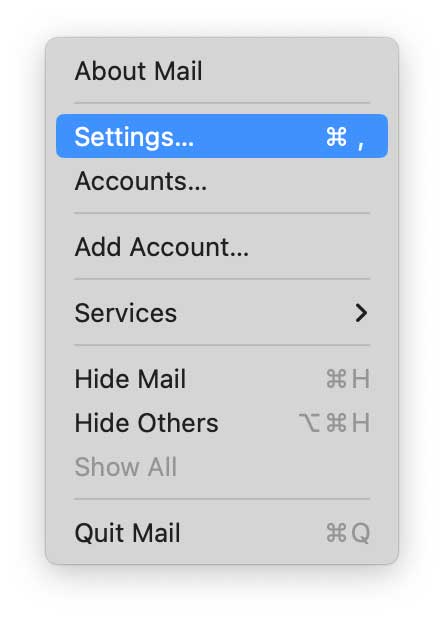
In the upper left corner of your desktop next to the Apple logo, click “Mail” and select “Settings” from the drop down menu:
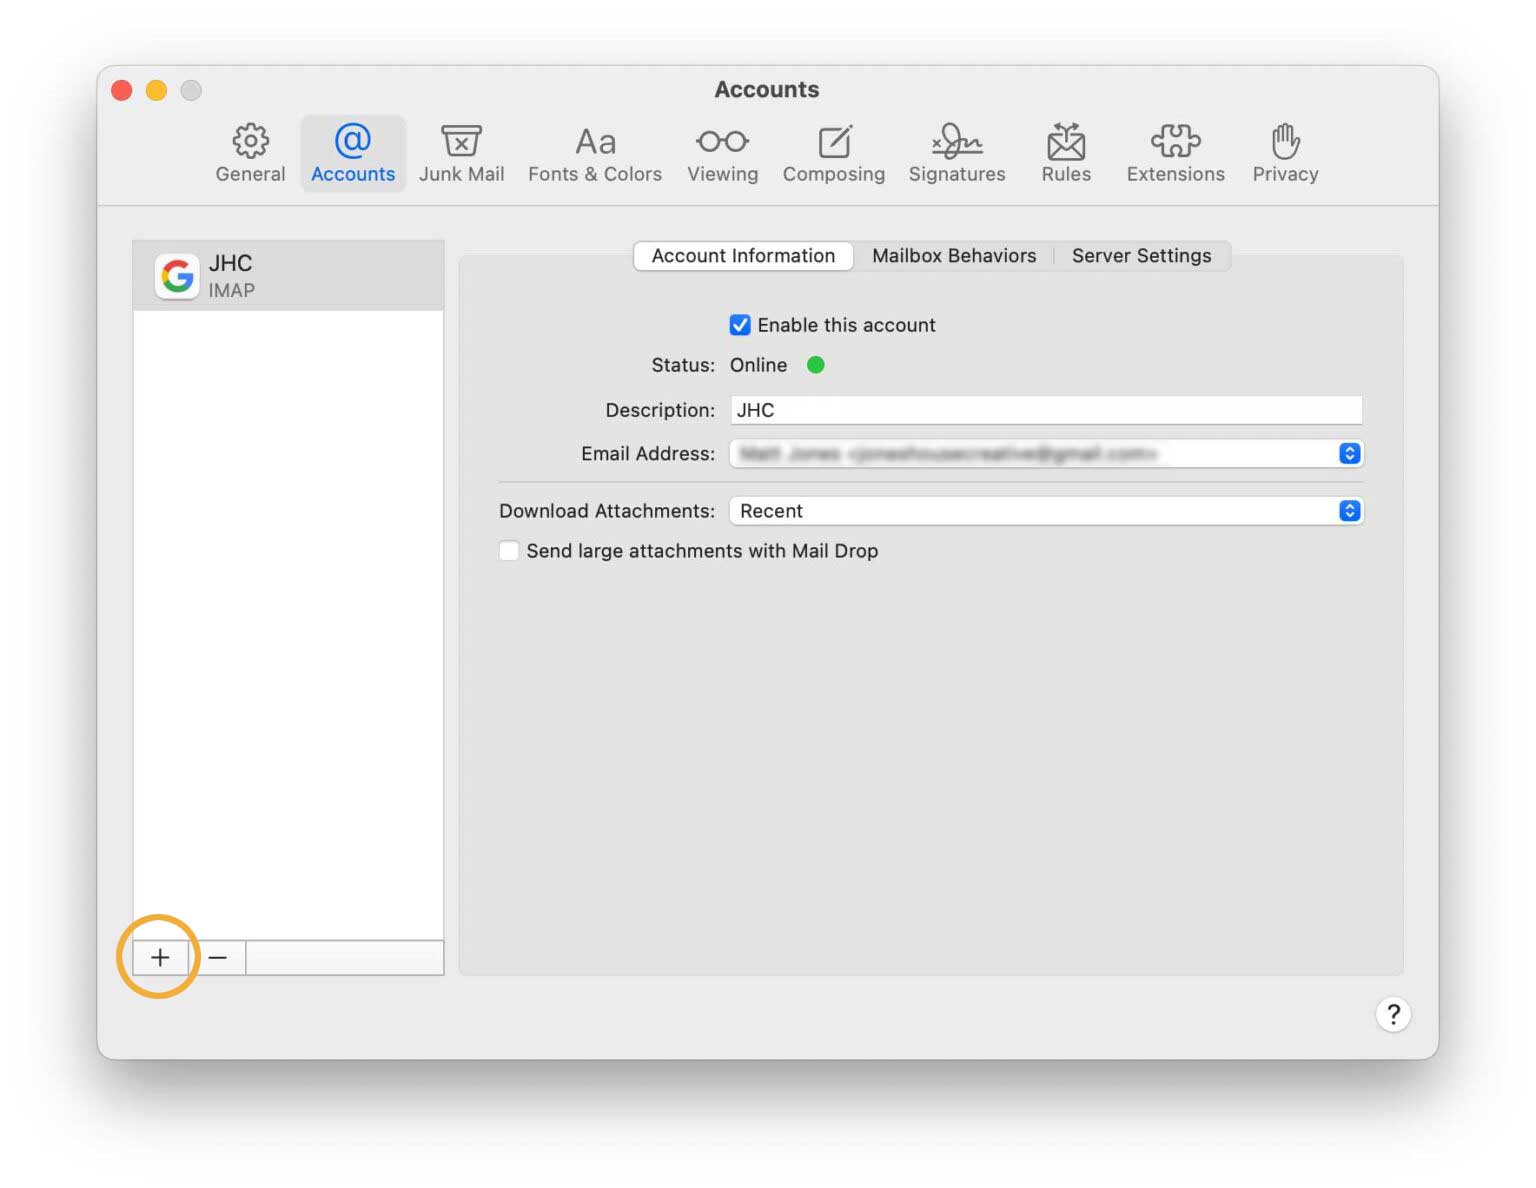
In the dialog window that opens, click the “Accounts” tab from the options at the top. On the left side of the window, click the “+” symbol at the bottom of the white accounts area (as seen in this image). If you already have an email address set up, you will see it listed in that area. If you do not, the area may be empty):
2. Choose the Account Provider
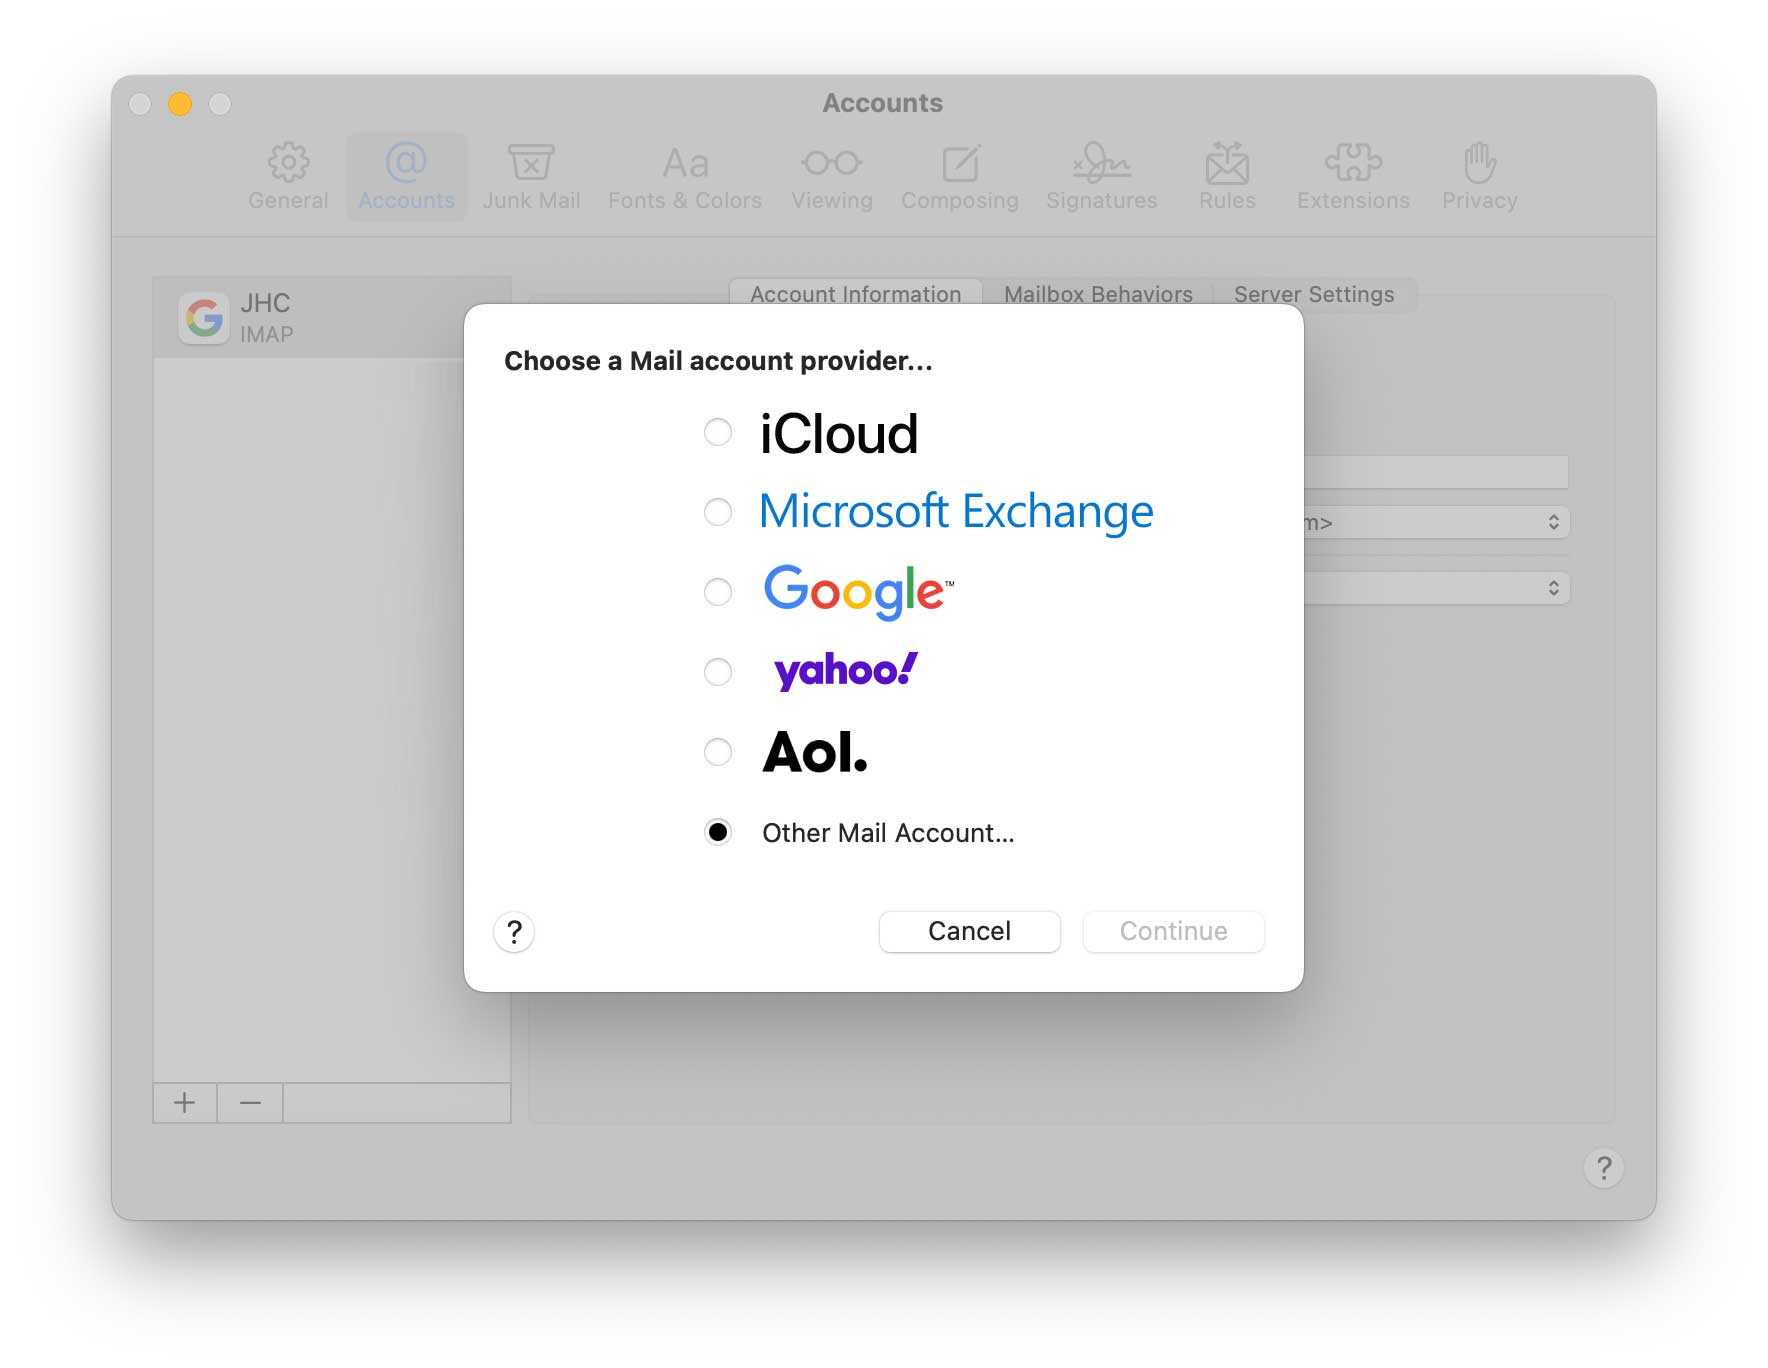
You should see a list of the different kinds of email addresses you can add. Today, we’re going to select “Other Mail Account” at the bottom of the list. Select it and click “Continue”:
3. Enter your email address information
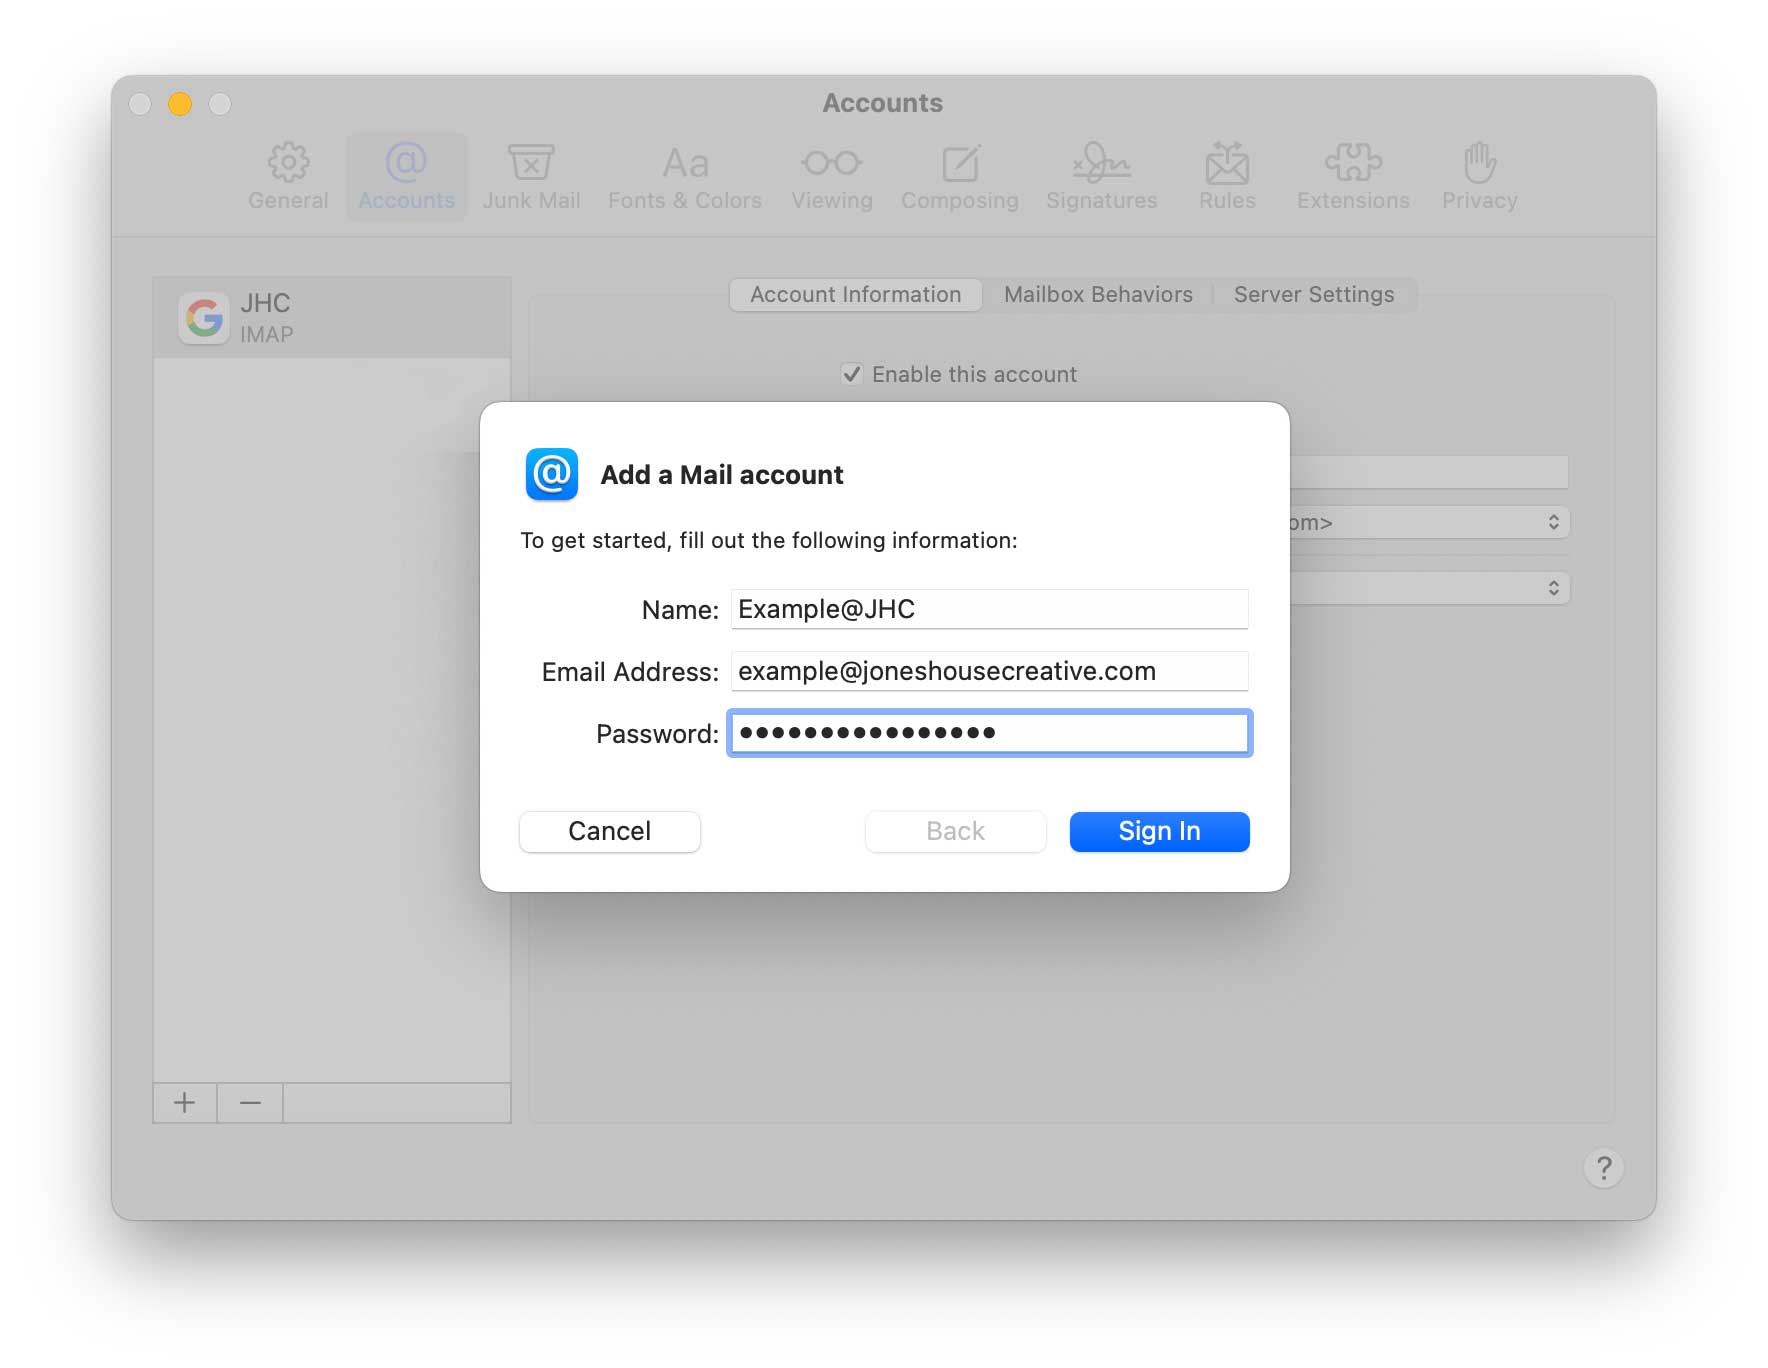
In the “Add Mail Account” form, you’ll input three pieces of information:
1. You’ll enter a descriptive name for your new email address. This is what other people will see in their inbox, so we recommend using your name or another clear identifier. For example, for our hello@joneshousecreative.com email address, we might give it the name “Hello@JHC” to help it stand out in our list of accounts in Mail.
2. You’ll input the full email address
3. You’ll enter the password for that email address (if you don’t have it, contact your host or whoever set up the account)
Fill in the fields, and click “Sign In.”
4. Ignore the error message 😁
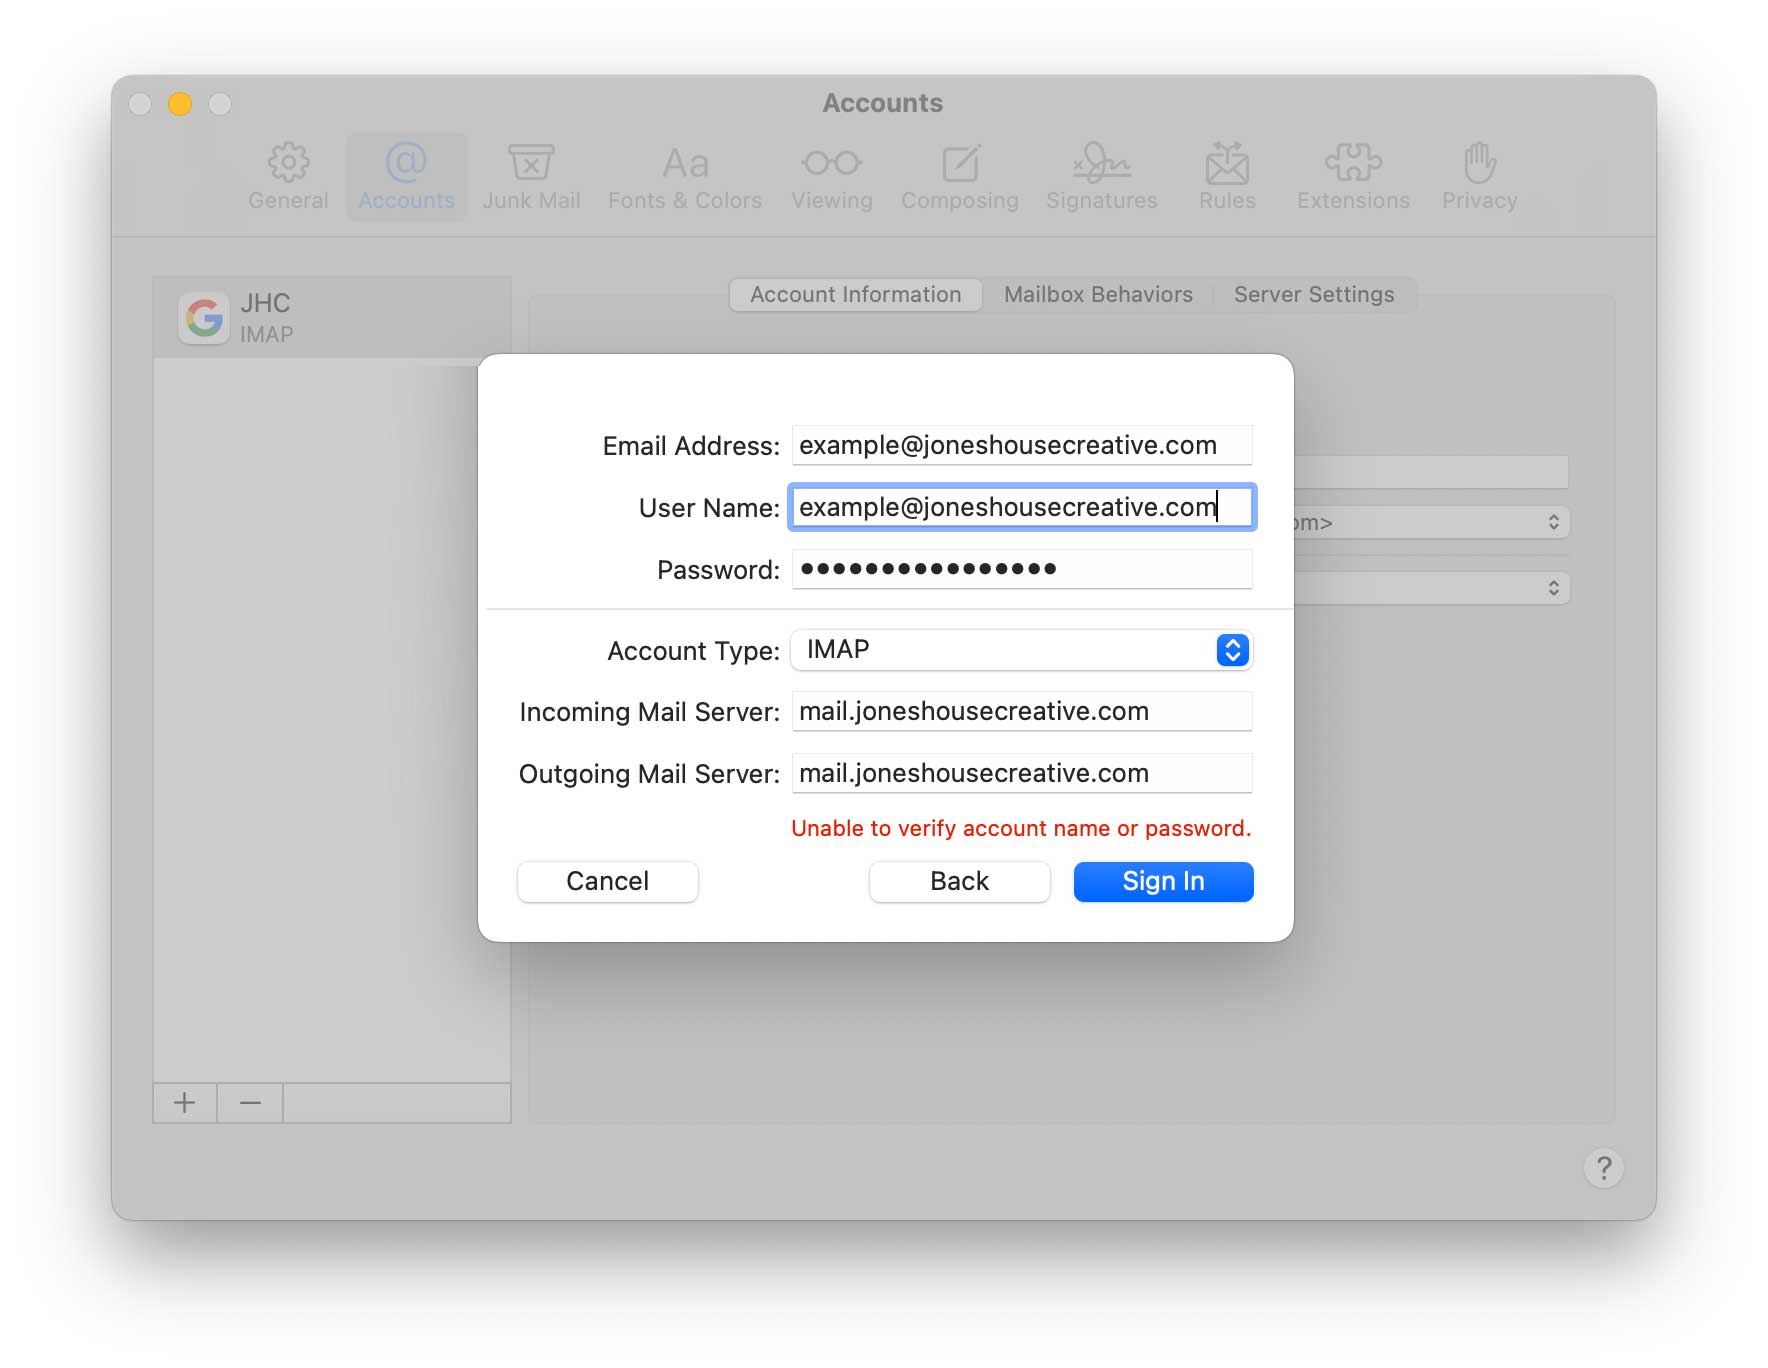
Mail is going to want a few more details, and may even display an error message saying it is Unable to verify account name or password. We’ll therefore have a second form to fill out, so input your email address again, and then your Username which, in this case, is your full email address. Fill it out and enter your password as well.
5. IMAP or POP?
In choosing your “Account Type,” you have two options: IMAP or POP. We recommend choosing IMAP as it will allow you to set up the same email account on multiple devices (laptop, phone, tablet) and have them all share those emails. Choosing POP means that the email files are downloaded to the device used to check the email address. Once they are downloaded, they are typically deleted from the server after a set period of time and can therefore not be shared by other devices. If you want to check this email address on your phone and your laptop, choose IMAP.
6. Incoming and Outgoing Server info
The last requirement will be to enter two pieces of information that tell your computer how to send and how to receive email. These are the incoming and outgoing mail server fields. You can get this information from your host or email provider. For our hosting clients, it will always be “mail.yourdomain.com” (substitute “yourdomain” for your actual domain name) for both fields. Enter the incoming mail server and outgoing mail server information and click “Sign In.”
6. Nearly done!
With those credentials entered and verified, you have completed setting up your email account in Apple Mail. You should see the following dialog box in which you can choose what apps on your device you want to use with this account (your dialog box may contain more app options):

Click “Done” on this dialog box to return to the Settings dialog box. You can close the box and return to your Apple Mail inbox. You should see your new email address listed in the Apple Mail sidebar and be able to send and receive email from that address.
If you are having issues, please don’t hesitate to reach out to one of our Jones House Creative team for help!